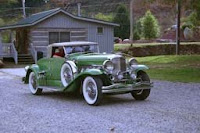
Open the image that is off color.
If it is not badly off color and there are off color areas which should be white (the highlights) or black (the shadows) use the White Point / Black Point method of color correction. This is:
- Add a Levels Adjustment Layer.
- To find the area that is the lightest in the image which should be white, press the ALT key and press the Highlight slide (the one on the right). The image should go black.
- Drag the slider to the left until a light area appears. This area will be the whites part of the image. Remember where that is.
- Move the slider back to the right and Click the Highlight eyedropper, the right of 3 eyedropers on the right side under Options.
- Click on the area that you found to be the whitest in step 3 and click here with the Highlight eyedropper. You can open the Info palette and you can see the R, G, B valuses as you move the cursor around in the image. When you are at the lightest or brightest part of the image the numbers will be the highest. Clickin in this area will set this area of the image to 255,255,255 or white and neutralize the highlights.
- To neutralize the blacks you follow the same procedure described in steps 2-5 but Alt+drag the black point. The image goes white and the first area to appear is the darkest area of the image. Use the Shadow Eyedropper (the one on the left) and click on the dark area, making this area 0,0,0, neutralizing the shadows.
- With an image that is not far off color, making the highlights and shadows neutral all tones in between should be correct.
- The middle eyedropper is the midtone eyedropper and if there is a neutral gray, 128, 128, 128, you could click this area with the midtone eyedropper and the midtones would be neutralized, removing any color casts.
Most of the time it is difficult to find an area that is a neutral gray, 128, 128, 128 so the following technique works well in these cases.
- With the image open duplicate the background and make the duplicate layer the active layer.
- Go Filter > Blur > Average. This filter averages all the color in the image and changes the image to show this averaged color. This color should be a neutral gray. To make it neutral,
- Add a Levels Adjustment layer.
- Click in the image with the middle eyedropper, the midtone eyedropper.
- This adjusts the tones on this layer to neutral gray. Click OK
- In the Layers palette click the eye next to the background copy layer (now adjusted to be gray) to turn if off or hide it.
- The Levels adjustment layers adjusts all layers under it so the adjustments you set to neutralize the background copy layer will be applied to the background, effectively neutralizing the midtones.
- The image should now look color correct.
- If the highlights or shadows still show a color cast you can apply the white point/black point method described earlier.
- The following images shows the before an after using this technique. Also shown is the Layers palette showing the layers. Layer 1 is the background copy with the Blur > Average filter applied.
 Image Before


2 comments:
is there a different key on the mac that you should use? I tried my alt key, with no success.
lol. nevermind! I figured it out. :)
Post a Comment